Uploading a print job
Learn how to upload a print job to Euler for analysis.
Uploading a print job lets you bring completed builds into Euler for quality analysis. You'll need a device set up before uploading.
Uploading requires a browser with the File System Access API. Google Chrome or Microsoft Edge is recommended.
How to upload
Choose printer
Navigate to the relevant device page or the print jobs page and click the Upload button. This opens the upload flow.

Select directory
Click Choose directory and choose the root directory where your printer stores build data. Euler reads the folder structure locally in your browser — no files are sent until you confirm in the next step.
Euler supports multiple folder structure variants across different printer models. Make sure the correct device type is selected so Euler knows how to interpret your directory. See Supported devices for more details, including how to request support for your device.
Verify
Euler parses the selected directory and presents a summary of what it found:
- Layers detected: the total number of layers identified
- Exposure images: post-exposure images assigned to each layer
- Recoat images: post-recoating images assigned to each layer
Review the detected files to make sure the layer count and image assignments look correct before proceeding. If something looks off, check that you selected the right root directory for the build.
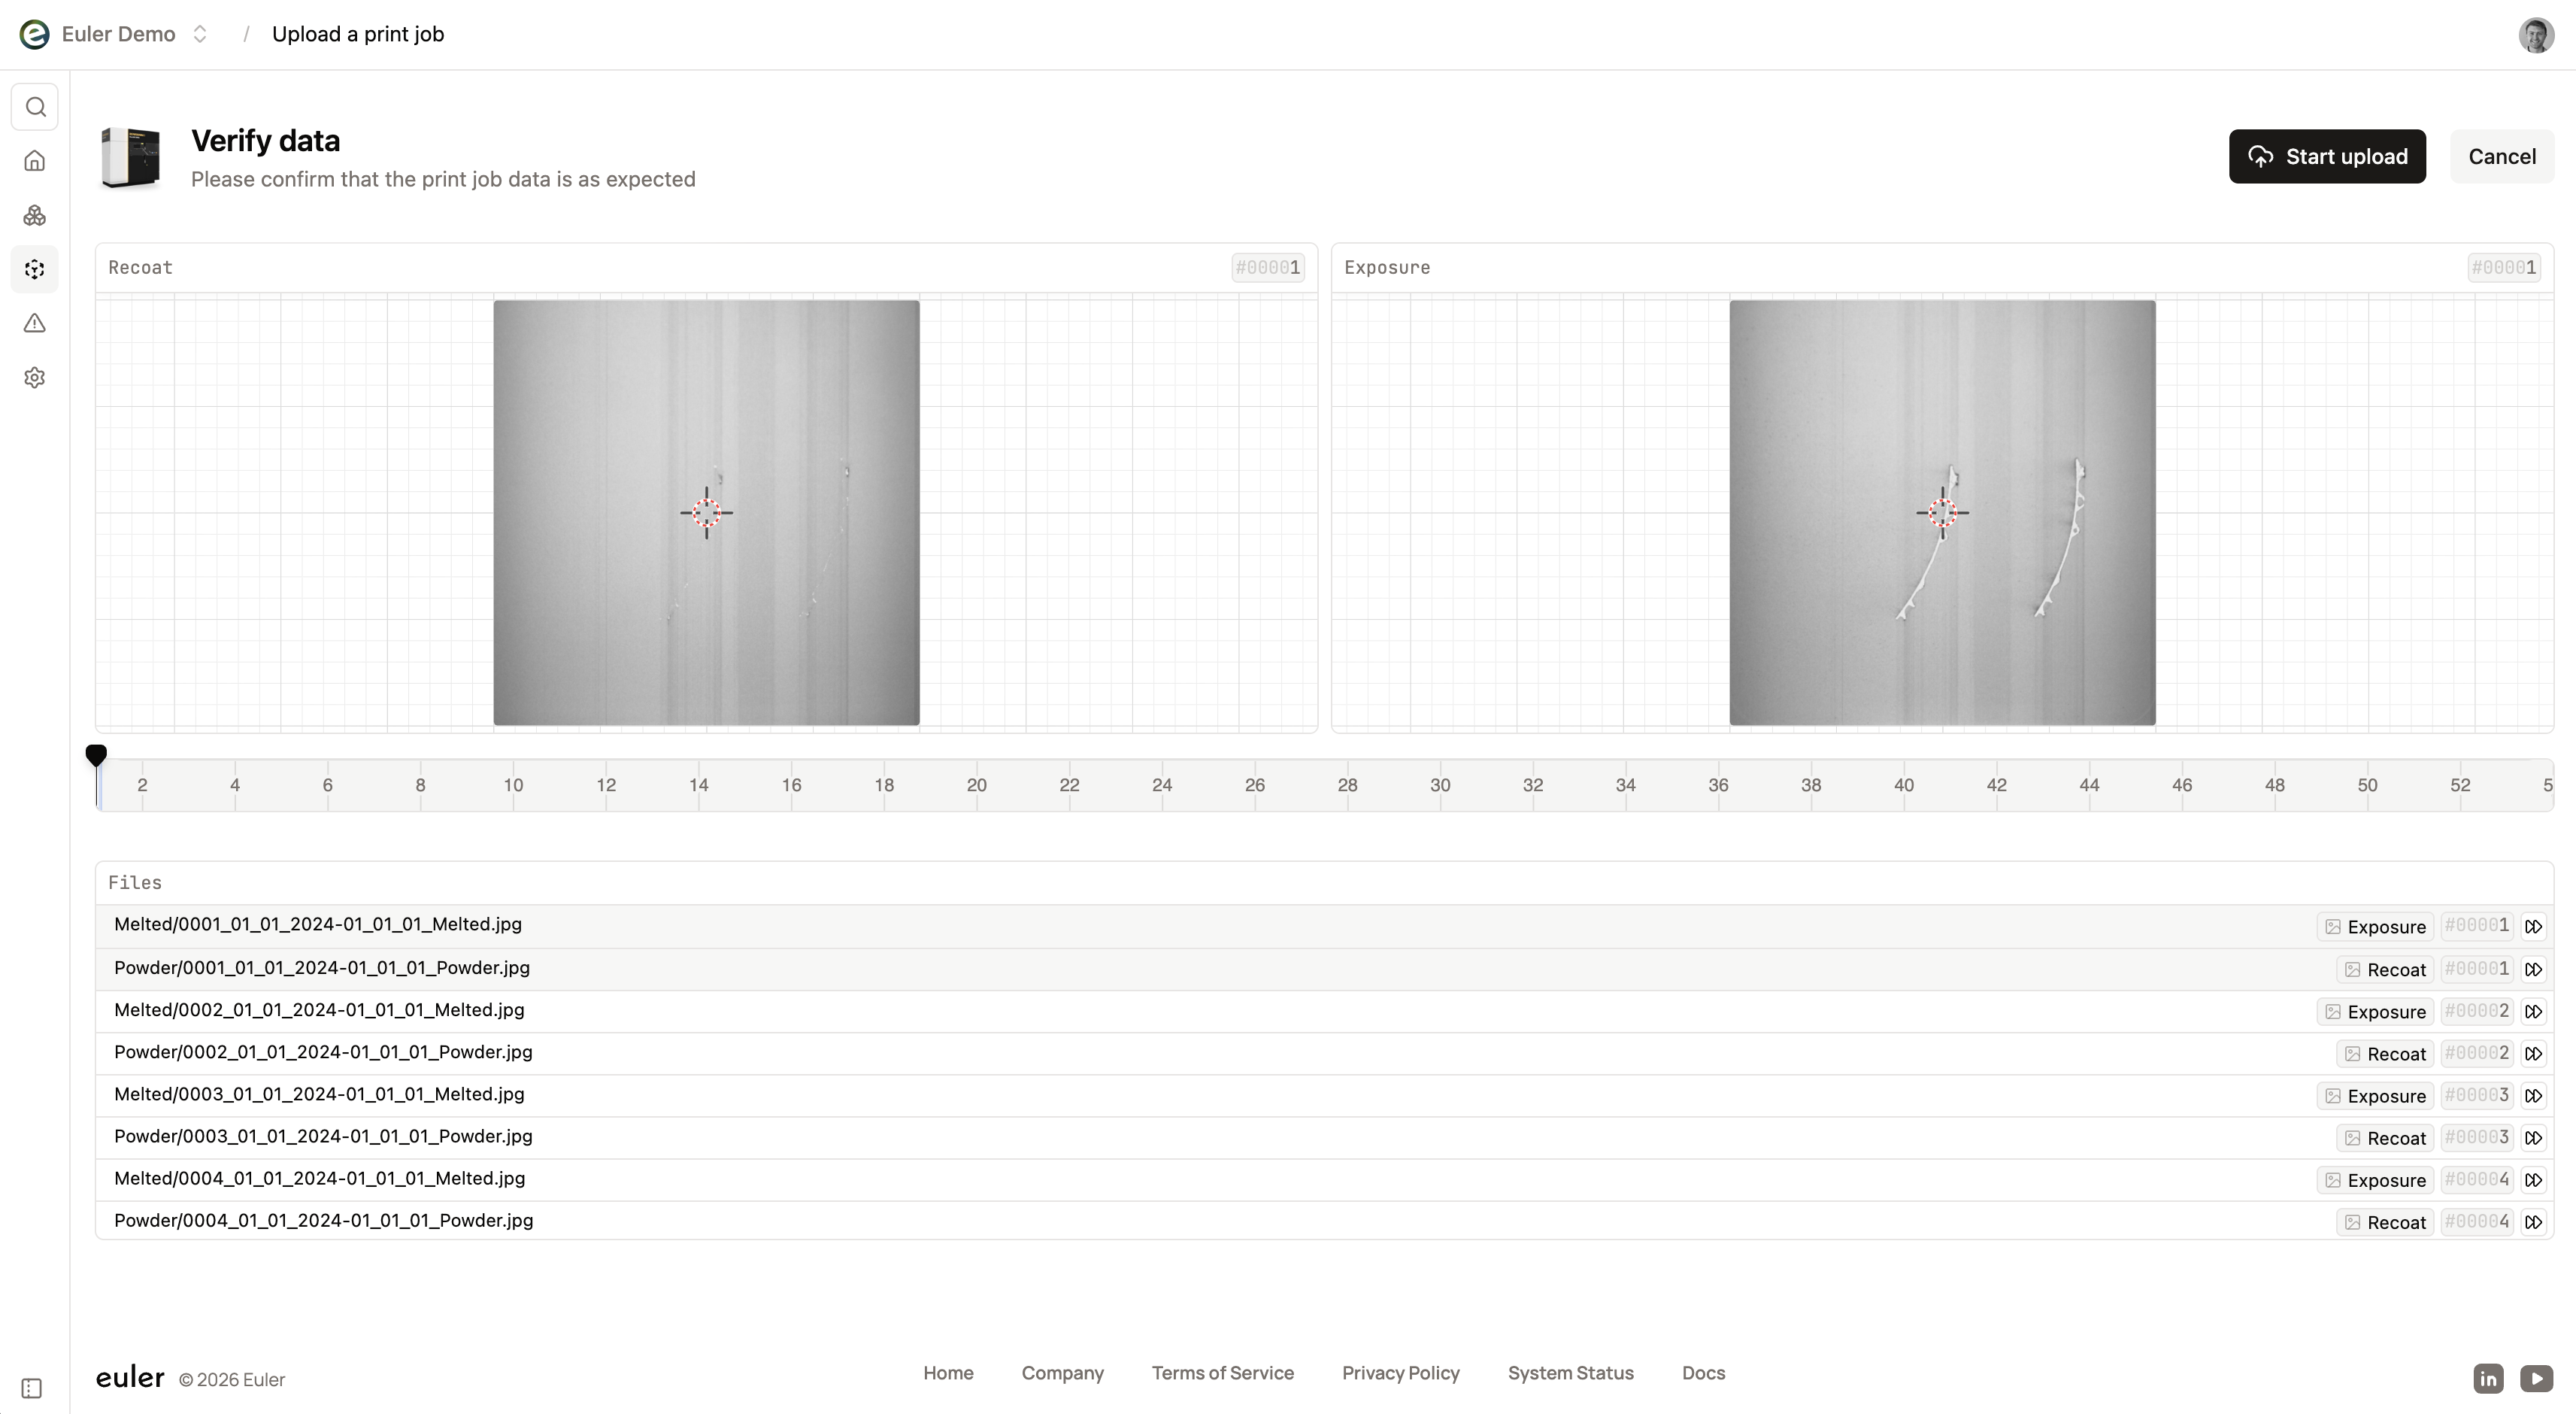
An example of uploading a print job to a Renishaw device with a Melted folder and a Powder folder.
Upload
Euler uploads the files to the platform. Uploads run in parallel and can be paused and resumed if needed. A progress indicator shows how many files have been transferred.
Complete
Once all files are uploaded, Euler finalizes the print job. You'll be taken to the new print job where you can view your layers in the layer viewer.
- Paid plan: the job is automatically queued for analysis.
- Free tier: the job is prepared for viewing. You can run analysis on it afterwards if you have credits available.
Once analysis completes, head to the defect definitions page to understand what Euler detected in your build.
Supported devices
The device type you selected when creating a device determines how Euler interprets the directory structure of your upload. Different manufacturers store build data in different layouts, so the correct device type must be set for Euler to parse the files accurately.
Currently supported manufacturers include EOS, SLM Solutions, Renishaw, DMG Mori, 3D Systems, Additive Industries, AMCM, Aconity, and others.
Requesting support for a new device
If your printer model is not in the device type list, you can submit a support request directly from the platform:
- Go to Settings > Devices & Datasources
- Click Request device support
- Fill in the form:
- Manufacturer: the name of the printer maker (e.g.
EOS) - Model: the specific model name (e.g.
M 460) - Recoat image path: an example file path to a recoat image from your build directory (e.g.
PrintJobs/job123/Post-recoating image/2024-01-15_layer42.jpg) - Exposure image path: an example file path to an exposure image (e.g.
PrintJobs/job123/Post-exposure image/2024-01-15_layer42.jpg) - Notes (optional): any additional context about the directory layout or device specifics
- Manufacturer: the name of the printer maker (e.g.
- Submit the form. The Euler team will review your request and follow up once the device is added or if more information is needed.